A new Mac development machine
Black Friday is a great opportunity to find new gear at reasonable prices, so having used the same personal laptop for eight years, this year I decided it was time to go bargain hunting.
To be honest my old machine aged quite well, and is still capable as the main workhorse for personal projects. With an Intel Core i5-826SU with 8 cores, integrated GPU, 8 Gb of memory, and Ubuntu on top, it runs just great. Objectively the only problem with it is a creaking hinge.
So why upgrade? A faster processor won’t hurt, but GPU and memory are needed for AI inference. I also wanted to maintain or improve upon all the checkmarks in the wishlist I laid out for my old machine:
- a high-resolution 13”-14” screen
- small and light form factor
- sturdy build
- USB-C connectivity, including the ability for the laptop to be powered by an external monitor
Choosing a new laptop
While shopping around I had two main questions on my mind:
- MacOS or Linux?
- MacOS is a polished experience, bound by a tightly integrated ecosystem that can be a befefit or a drawback depending on what you’re trying to do.
- Linux provides a lot of freedom and flexibility, at the cost of some minor nuisances here and there, specially with hardware support.
- Windows is an absolutely valid choice, but I feel at home in a *nix CLI and would spend most of the time mucking around in WSL.
- AArch64 or x86_64?
- AArch64 (also known as ARM64) was released in 2011. In the ARM ecosystems ISA blueprints are released and chip producers are able to customize their designs. The architecture’s simplicity, energecy efficiency and customization options means you can find it anywhere: smarthphones, tablets, personal computers, and servers. The Mac product line has successfully transitioned into this ISA. For Windows and general-purpose Linux distros the support is still spotty, traditionally this ISA has tight integration between hardware and software.
- x86_64 (also known as x64, x86_64) is a 64-bit extension of the x86 instruction set. Announced in 1999 by AMD and became the de-facto standard 64 architecture, overcoming Intel’s IA-64. Windows and general-purpose Linux distros have great support.
My preference was really AArch64, it’s cost efficient and it’s everywhere. Being able to develop on the same ISA that will then be deployed into the cloud would be great. But with mainstream Linux distros lacking good support the choice really narrowed down to the Apple ecosystem, which is expensive…
But then again, is really necessary to go for one of the expensive options like a MacBook Pro, or a Mac Pro? The MacBook Air is a pretty good machine nowadays, it packs lots of computing power into a small, comfortable and well-designed package. The expansion options are not as great, but with an amazing performance per watt and a battery that lasts for a full work-day and more, it’s a very capable machine. I found a good deal on the the 10 core M4 with 24 Gb of Ram and clicked the Order button. It’s been working great so far.
Basic set-up
It’s always a great idea to have your files on the cloud. Depending on the file type (documents, photos, code) and on the control you want to have (public cloud, homegrown server) you might use different products. I keep everything centralized in a couple of cloud services, plus I have a home backup. So accessing and syncing my stuff was a breeze.
While there’s a ton of customization and tweaks it’s possible to put into the OS. The really important stuff is very easy to configure. I probably spent an hour or so with the following steps, after which I had a fully workable development machine.
Apple developer tools
The Apple Developer Tools are a suite of software tools from Apple to aid in making software dynamic titles for the macOS and iOS platforms.
One of the main tools in the bundle is Xcode, which is also available as
a free download from the Mac App Store. However there’s a lot of other useful tools
included, the one I’m after is git.
This pulls the Apple developer tools:
xcode-select --install
Secure Shell Protocol
The Secure Shell Protocol (SSH Protocol) continues to be the standard for operating network services over unsecured networks. It is also the most convenient protocol for securing git connections.
Create a key pair using the ed25519 elliptic curve algorithm.
Known for fast signing and verification, should be ready for
Post-quantum cryptography.
When prompted, enter a strong passphrase, then add the passphrase to the Apple keychain:
ssh-keygen -t ed25519 -C "example@mail.com"
ssh-add --apple-use-keychain ~/.ssh/id_ed25519
Configure the MacOS SSH-agent
to always use the Keychain in ~/.ssh/config:
- The
AddKeysToAgent yesentry loads the SSH-agent - You can add an
IdentifyFilefor each of your private keys - The
UseKeychain yesentry tells SSH to look in your OSX keychain for the key passphrase
Example:
cat <<EOF >> ~/.ssh/config
Host *
    AddKeysToAgent yes
    UseKeychain yes
    IdentityFile ~/.ssh/id_ed25519
EOF
Configure your shell to load the Keychain whenever an interactive session is started.
echo "ssh-add --apple-load-keychain -q" >> ~/.zshrc
Git source control
Git is a distributed version control system, that is capable of managing versions of source code or data. It is the most popular distributed version control system.
There are platforms offering Git repository services, including GitHub, SourceForge, Bitbucket and GitLab. However you can use git independently, the full project history is stored local database that can be synced with other peers when desired.
Start by setting your basic info:
git config --global user.name "John Doe"
git config --global user.email "example@mail.com"
Having configured secure shell enables using git over ssh transport
to interact with external repos. To provide some protection against
supply chain attacks
you should also set up git to sign your commits. The following recipe
will help with the local setup:
git config --global gpg.format ssh
git config --global user.signingkey "key::$(cat ~/.ssh/id_ed25519.pub)"
git config --global commit.gpgsign true
git config --global tag.gpgsign true
mkdir -p ~/.config/git
echo "example@mail.com $(cat ~/.ssh/id_ed25519.pub)" > ~/.config/git/allowed-signers
git config --global gpg.ssh.allowedSignersFile "~/.config/git/allowed-signers"
Homebrew
Homebrew is an open-source package manager for macOS (and nowadays Linux). It simplifies the installation of software packages by providing a simple CLI interface, no more drag and drop to install tools. Removing packages is just as easy.
Homebrew installs packages to their own directory and then symlinks their files into /opt/homebrew (on Apple Silicon). It won’t install files outside its prefix and you can place a Homebrew installation wherever you like. That means you can organize your system in any way you want.
The script installer explains what it will do and then pauses before it does it.
There is also a .pkg installer nowadays, you can download it from
Homebrew’s latest GitHub release.
The easiest way is just running:
/bin/bash -c "$(curl -fsSL https://raw.githubusercontent.com/Homebrew/install/HEAD/install.sh)"
echo 'eval $(/opt/homebrew/bin/brew shellenv)' >> ~/.zprofile
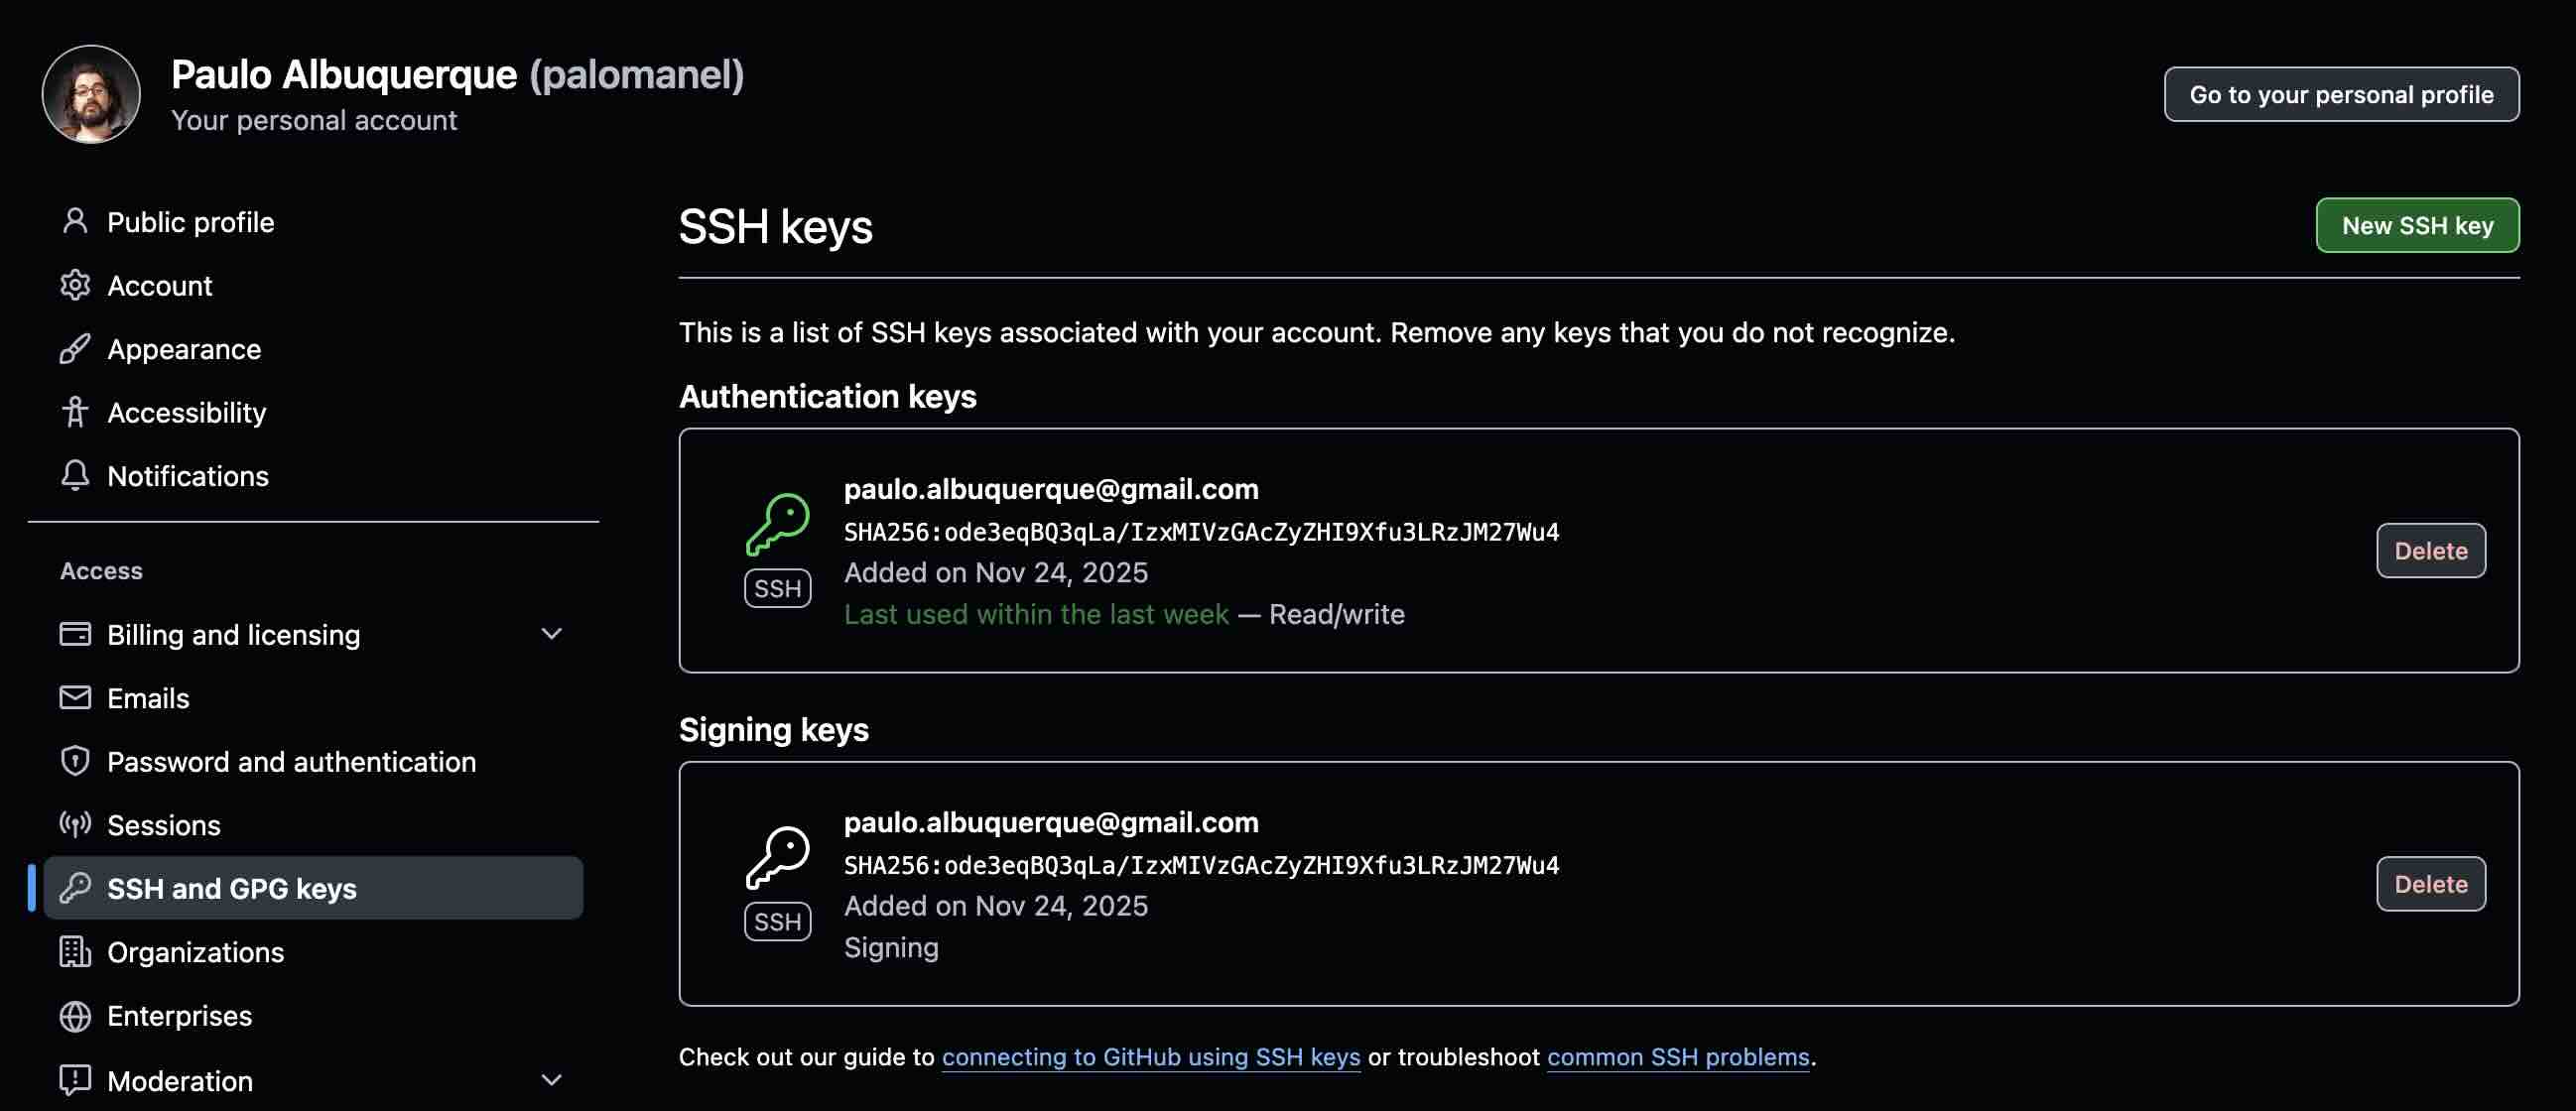
Then add your public key in the code hosting services you’ll be using. Keep in mind you’ll need to add the same key for two different purposes:
- Authentication key
- Signing key
Here’s how it looks on GitHub, if you check I have added the same public key for both purposes.
A Terminal alternative
The native MacOS Terminal app is a bit lacking, so I typically install something
else. iTerm is a good option, but recently I started using
Alacritty, which is Open Source and written in Rust
and allows for extensive
configuration.
By integrating with other applications, rather than reimplementing their
functionality, it manages to provide a flexible set of
features
with high performance.
The supported platforms currently consist of BSD, Linux, macOS and Windows. The software is considered to be at a beta level of readiness; there are a few missing features and bugs to be fixed, but it is already used by many as a daily driver. Precompiled binaries are available from the GitHub releases page.
Mac OSX will refuse to run the app as the binary is not currently signed, to be able to use Alacritty it will be necessary to tweak its file attributes.
xattr -dr com.apple.quarantine "/Applications/Alacritty.app"
Docker Desktop
Docker is an open platform for developing, shipping, and running applications. It enables you to separate your applications from your infrastructure so you can deliver software quickly by using operating-system-level virtualization to deliver software in packages called containers.
The Docker Engine is licensed under the Apache License 2.0. Docker Desktop distributes some components that are licensed under the GNU General Public License. Docker Desktop is free for personal use, small businesses (fewer than 250 employees AND less than $10 million in annual revenue), education, and non-commercial open-source projects. For all other commercial use, a paid subscription is required.
Docker Compose is a simple tool for defining and running multi-container applications. It is often used to define simulate complex architectures in a developer machine.
Installing Docker Desktop is an easy way to set-up the Docker daemon on Mac OSX, you also might want to install docker-desktop:
brew install --cask docker-desktop
brew install docker-compose
On MacOS docker runs on top of a virtual machine, an approach that has its drawbacks. In the past year Apple has released Apple native containers a native and lightweight solution. But that’s a post for another day.
Visual Studio Code
Visual Studio Code (commonly referred to as VS Code) is an integrated development environment developed by Microsoft for Windows, Linux, MacOS and web browsers. Features include support for debugging, syntax highlighting, intelligent code completion, snippets, code refactoring, and embedded version control with Git. Users can change the theme, keyboard shortcuts and preferences, as well as install extensions that add functionality, including to extend its capabilities to function as an IDE for other languages.
Visual Studio Code is proprietary software released under the “Microsoft Software License”, but based on the MIT licensed program named Visual Studio Code – Open Source.
Install VS Code using brew, then you can then install any extensions you need,
like the DevContainers extension.
brew install --cask visual-studio-code
code --install-extension ms-vscode-remote.remote-containers
By this point was ready to start my new blogging adventure!